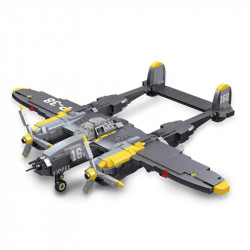
Build: Pan Am China Clipper

Build: Pan Am China Clipper
I present this stunning flying boat, which was a popular choice for my second Instagram post asking what I should create next. Contrary to what I initially believed, only the gift-box set version of this model has been decommissioned. However, I decided I had to acquire it when I believed it would be unavailable—for, hey, a flying boat!
There are also a lot of fascinating aspects of this project. I'll own my ignorance once more and say that I can't really describe these items using their proper names, but that's me for you! What appears to be a second, shorter pair of wings concealed behind the more enormous wings is my favorite detail—one that I was unaware of until I began knocking out the model. The struts, supports, and bars on the tail, both above and below the tail-wing-thingies, are the other aspects that I truly enjoy. I could look it up on the internet, but that would be pretending to know something I don't. The bigger picture, of course, shows that this is a hybrid of a boat and an airplane! To be truthful, what a strange thing.
There are some incredibly creative design techniques in this model. At the same time, it's more complicated than you may think. Nevertheless, I had a great time creating this one, and I believe you will, too. This model is also relatively quick to develop—I even completed it in a single build session—in contrast to some of the more current models. I don't think I've done it with anything besides Legends-style models in a long time. In any case, the engines and the hull/body formation present the most significant challenges. And to get the engines to work, I'll admit that I had to use some UV-cured adhesive or resin.
It should come as no surprise that the nose is the first extremely challenging aspect of this build. Additionally, the plane's primary body, including the cockpit, has a curved shape. I wish I could offer some wise counsel, but I don't. My build still has some minor gaps in the borders, particularly under the front portion, as you may have seen in the images above. You need to give it your best shot and then make adjustments after everything is in order. I have to change it, at least for me. The first time, my best is never truly good enough. Hehe.
The framing elements between the large wings and the lower "winglets" present another difficulty or two. These pose two difficulties and are first fastened to the winglet. First, determining their orientation is essential because these framing elements don't blend well with the distorted perspective that was employed to depict the components' three-dimensional arrangement in the instructions. Since proper alignment is crucial, some of the images above will clarify it for you. Securing them is the second step, which is never easy when only two parallel tabs are holding the part in place. The fact that you can't twist them to fasten them only makes it more difficult. You can't leave them twisted, at least. Give them a tiny twist, and then fold them. When folding, the twist keeps the section perpendicular.
Nevertheless, the fact that those tabs must be folded contributes to the genius of this mode design because they are entirely concealed inside the wing! Likewise, the tail wings (parts 8 & 12) conceal the supports (parts 9 & 10) at the tail-fin/tail-wing joint. Even though one tab is visible, it still looks rather good in the end. Because there isn't much room for error when fitting the support bars and tabs through the tail-wing-thingies, it is important to fold them as near to the edge as possible.
My following piece of fast advice may seem apparent to you, but first, it wasn't to me. I made an effort to align all of the tabs simultaneously as I was trying to attach the enormous wings' lower portion (part 19). Yes, I realize it's stupid. It is entirely ineffective. What is effective? Line up the first and second tab pairs, beginning at one end and, after that, securing the first two. After that, align the following tabs on either side, securing one or two as you go until you reach the other end of the wing. Go back and secure the remaining tabs to complete the process. It's much simpler that way.
Let's move on to the engines. Oh, the engines. In my build, there is a lot of UV glue concealed in the engine couplings. Nothing wanted to stay securely fastened, not because anything broke. As you put these pieces together, just be careful handling them since they can get unsteady very quickly. In addition, the directions about the conical parts of component 25 were unclear. The conical flaps appear to come flush to the cylinder's edge in the instructions' diagram, so I made them that way. However, after the engines are attached to the wing on both sides, you actually have a small gap. Keep the coney bit facing directly out from the rear of the cylindrical bit to avoid headaches. Additionally, it might not be a good idea to fold the bottom flap all the way down, as illustrated. I'll elaborate on that later.
Alright, so the large wing gave me another fool moment. The idiots came out because of something. After making sure all the front tabs were perfectly aligned, I proceeded to secure the back together by folding all the tabs down over the lower part of the wing. However, that is incorrect. There are two tabs at the back of the wing that fold down and two that fold up over the upper half.
Furthermore, they are not distributed symmetrically, which is odd. Thus, could you pay attention to their location? Oh, and the wings' two tabs fold down around the underside.
Finally, closing those engines' bottom flaps is the final stage. I folded those down all the way to the 90-degree mark as instructed. This, because of the curvature of the sections on either side of the 90-degree bend, made them incredibly reluctant to fold back over. And that only includes the two outside engines. By being encircled by the support framing between the winglets and the large wings, the two internal engines also add intrigue. This is where I mention that, even though it would have been a little more complicated to align the two sides of the large wing together, I wish I had chosen a shallower fold for those flaps.
