Airplane Turbine Engine Model Kits
Sky-High Precision: Crafting Airplane Turbine Engine Models
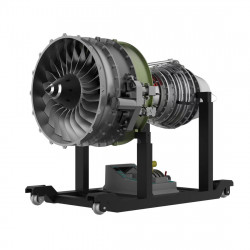
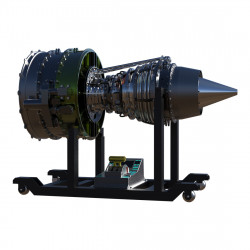
Vintage airplane turbine engine models are intriguing curiosities to aviation enthusiasts and modelers. Genuine works of art and workmanship, these tiny turbojet-hearted engine replicas are just amazing. These metal or high-quality plastic kits require meticulousness and patience for a rewarding combination of engineering and artistry. This step-by-step guide focuses on the appeal, parts, how to assemble, and pro tips when building turbine engine models.
The Appeal of Turbine Engine Models
Turbine engines, whether they are modeled to depict jet engine types (such as turbofans or turbojets), have a high level of technical complexity and aesthetic value. Their intricate parts and moving pieces are based on actual aviation technology, which has made them popular with model builders, collectors, and aviation enthusiasts. The appeal is instant: the puzzle to assemble and the beautiful thing you get to finish gazing at.
Wonders, Small Enough for a Dollhouse
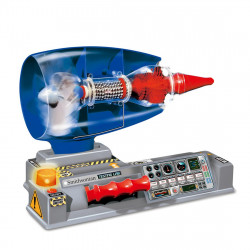
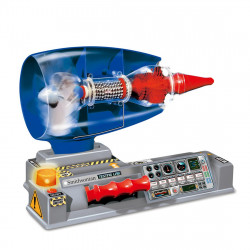
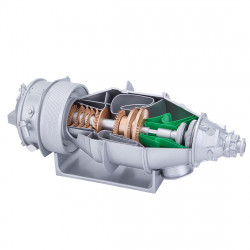
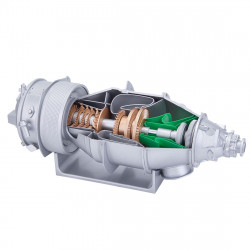
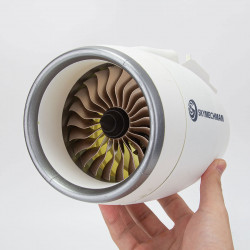
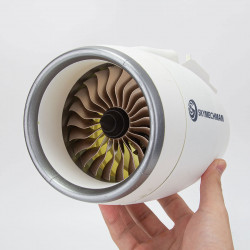
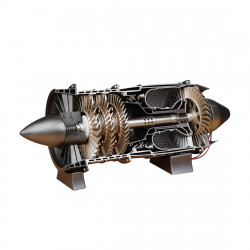
These kits portray the inner workings of turbine engines. They include the fan blades, stators, and turbine blades. Spinning and/or illuminated rotor disks or sections driven by small motors provide insight to aeronautical engineering, like that of a functional model.
- Simulation Engine: Replicate compressor stages and turbine revolutions.
- Special Controls: Moving or shining of the motor or LEDs.
- Technical Beauty: Shiny surfaces draw attention to precision craft.
Educational Value
Constructing a mock-up turbine introduces some of the aerodynamic and jet propulsion concepts of thrust and airflow. Every model builds upon its predecessor, meaning that each model in the series becomes more complex as the series progresses, so these kits are perfect for students who are interested in a future in aviation, hobbyists, or engineers who want logical, consecutive models to undertake.
- Learn by Doing: Discover turbine stages and thermodynamics.
- Emphasize Skill Development: Helps children develop precision and problem-solving ability.
- Practical Implications: Coincides with real aerospace applications.
Collector-Worthy and Display Ready
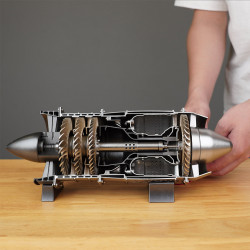
Finished examples, which are often 20–40 cm in length, make perfect decorations for homes, offices, or workshops. The finely detailed accessories are admired collectibles with a functional use and are ideal for any aviation collections, as a desktop touch, helping to relieve stress at work among enthusiasts.
- Showpiece Grade: Great to display on a desk or shelf.
- Conversation Starter: Fires up conversation about aviation tech.
- Long-Lasting Construction: Metal or plastic for durability.
Anatomy of a Turbine Engine Model Kit
You need to know what’s in the box for a start. Each piece will make the model more functional and realistic. An understanding of these factors facilitates the assembly and diagnosis of the problems.
Core Components
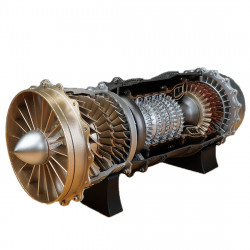
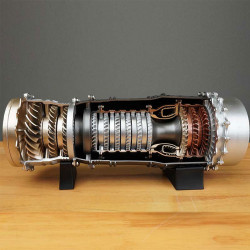
Kits consist of 200–1000 or more laser-cut stainless and stamped aluminum/plastic parts, fan blades, compressor rotors, nacelles, combustor and afterburner assemblies, and nozzles. Metal kits are more durable, while plastic ones are lighter to fly.
- Precision Parts: Laser-cut for precise shapes and often anodized for color.
- Variety of Parts: Support (casing) and mobile (rotors) components.
- Choice of Material: Metal for a high-end feel, plastic for ease.
Power and Motion
A small electric motor (5V powered or battery-powered, e.g., 3.7V 500mAh) is employed in most of the kits to rotate the fan or turbine. Some feature a hand crank that allows manual operation. Higher-end versions include LEDs for lit chambers or sound modules for jet-type effects.
- Electric Motors: Drive spinning blades or compressors.
- Hand Cranks: For direct motion control.
- Flyer: LEDs or sound for that added effect.
Assembly Tools
Kits include and may require tools such as screwdrivers, tweezers, or needle-nose pliers to connect parts using screws, tabs, or slots. No glue is typically needed. What’s more, some additional equipment—magnifying glasses to help with tiny parts.
- Tools Provided: Mini screwdrivers/wrenches.
- Recommended Extras: Tweezers (for all small parts), pliers (for bending).
- Connection Method: Screw hole or tab-slot for standing builds.
Instruction Manual
There is an extensive manual of the model explained, using diagrams, the assembly process, with technical information. Some even feature aerospace history or engine mechanics descriptions, which add to the educational value. It’s important to have clear visuals for intricate assemblies.
- Illustrated Steps: Explain the location of parts and the connections.
- Technical Insights: Describe how a turbine works or is made.
- Reference Tool: Have handy while building.
Choosing the Right Kit
Choosing a kit that is at once suitable to your skill level—easy, moderate, or devilish—your interest, and the amount of time you want to invest determines a successful build. Take these factors into account to determine the right turbine engine for you. It’s a good decision; that’s how the success story begins.
Skill Level
Entry-level kits (200–300 pieces, 3–5 hours) are ideal for beginners, with less intricate turbofan concepts. Intermediate (300–600 pieces, 5–8 hours) and advanced (600+ pieces, 8–12+ hours) models, including detailed turbojets, offer even experienced builders some challenges.
- Beginner: Simple turbofan or single-stage varieties.
- Medium: Multistage turbofans/turbojets.
- Advanced Full: Full-on jet engine with intricate machinery.
Engine Type and Theme
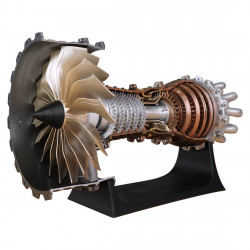
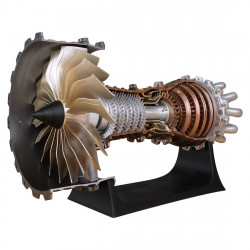
Kits recreate a range of types of turbine engines, from turbofans (as seen in commercial jets) to turbojets (used in military fighters) to historical engines—even those on early jet prototypes. Select by what is interesting to you—aviation fans would probably want a modern Airbus A380 turbofan, while military fans would choose an F-16 turbojet.
- Commercial Aviation: Airliner turbofans.
- Military: The turbojet for the fighter.
- Historical: Early jet or other experimental engines.
Build Time and Space
Quick kits accommodate short schedules, and more advanced models take several sittings and plenty of space. Maintain a well-lit table (min 60x60 cm) for accessories, tools, and storage. Please confirm model size (30 cm) for display/decoration.
- Quick Builds: 3 to 5 hours for a simple build.
- Long Projects: 8–12+ hours is good for a detailed model.
- Space Requirements: Large area for sorting and building.
Prepare for Accurate Building
A well-organized workbench and good tools make it much more accurate and enjoyable. A proper setup prevents mistakes and ensures a clean build. Find something stronger to open with by taking the following steps.
Workspace Essentials
Select a clean, flat table with a cutting mat to help protect the surface of the table. Fold up the puzzle and use a rolling mat, or find a flat puzzle tray where you can store it in progress. Adjustable LED lighting makes focusing this microscope lens automatically relieve the eyes for the most minute detail work, such as small metal parts.
- Large Table: Store owner’s manual and parts, tools.
- Protection: Protect your working surface with a cutting mat or a cloth.
- Good Lighting: Detailed visibility with LED lamp.
Tool Checklist
Organize tools that came with the kit (e.g., screwdrivers) as well as any extras, such as tweezers, needle-nose pliers, and a magnifying glass. And a towel keeps fingerprints off glossy metal or plastic. Keep all your tools in a small caddy for quick access.
- Exacto Knife Tools: Argan oil to soften glued parts, tweezers to remove small tabs, and pliers to bend and twist the tabs.
- Amplifying: Lets you see minute screws better.
- Clean Touch: The Cloth will not scratch the surface of your sail.
Safety Precautions
Wear goggles when working with metal components to protect against stubborn fragments of debris that may fly into your eyes. Wear gloves for cutting edges, especially metal kits. Have a first-aid kit handy in case of minor cuts or scratches.
- Eye Protective: Protects against flying debris while cutting.
- Hand Safety: Gloves when cutting or dealing with sharp edges.
- Emergency Prep: Band-Aid strips for small cuts.
Step-by-Step Building Process
The build will be perfect with this systematic approach. Construct your model by following these steps in detail. Each stage leads to a working scale model that takes to the sky.
Step 1: Study the Manual
Carefully read the instruction manual, making note of part numbers, assembly sequences, and any special notes (e.g., motor wiring or blade alignment). Get used to diagrams unless you don’t want to screw up.
Step 2: Check and Sort the Parts
Gently snap parts off metal or plastic sheets and organize by type in the included trays (e.g., fan blades, housing, etc.). Inspect for any missing or damaged parts; contact the manufacturer for replacements. The organization saves time.
Step 3: Bring the Core Structure Together
Begin with the engine pod or main body and add structural components with screws or tabs. Stability is the key, so be sure to make tight connections with the level connection, as the housing is what keeps all moving parts in place.
Step 4: Assembly of the Mechanical Components
Attach the fan blades, compressors, and turbines in the order indicated in the manual. Turn the test rotation by hand to make sure everything runs smoothly. Make sure to line up components thinly so they won’t get stuck or wobble.
Step 5: Power and Accessorize Addendum
For electric models, fix the electric motor, battery, or crank mechanism; wiring (do not wear) should be smooth. Add LEDs or sound modules to bring life to your layout. Function test to verify correct installation.
Step 6: Testing and Finishing Perfected the Tests Used to Obtain That Number
Run the model to check jams, free motion, or unneeded parts. If necessary, tighten screws or adjust the parts. Rub metal pieces with a soft cloth or clean plastic pieces with a showroom finish and store or display.
Overcoming Common Challenges
Turbine engine kits bring issues of their own, in that they tend to involve intricate mechanics or fragile parts. Proactive solutions keep your build on schedule. These pieces of advice solve common problems and are very simple.
Mechanical Misalignment
Fan blades or turbines can become blocked due to an incorrect separation between the turbines or due to debris. Use pliers for fine-tuning the alignment of parts. Clean off parts with a brush or compressed air for smooth rotation.
- Spacing Adjustment: Refer to the manual for blade or gear gaps.
- Clean Components: The dust or the shavings should be eliminated.
- Testing Motion: Manually rotate to see if anything is wrong.
Fragile or Small Parts
Small parts, such as screws or exhaust fins, can be bent or lost. Use tweezers and very gentle force. Work on top of a tray to catch any loose parts and prevent them from getting lost.
- Gentle Care: Be especially gentle with fragile items.
- Control: Prevents loss of article.
- Substitutes: Contact the manufacturer for spares.
