Vintage Model Cars
Model Car Vintage Style: Crafting Classic Rides in Miniature
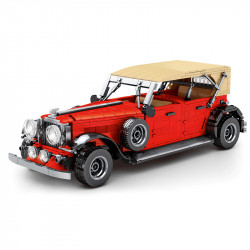
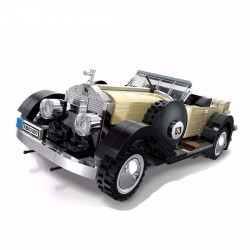
Model car vintage style brings back memories of classic cars, adds the beauty element of the times, and incorporates the style design from historic cars. These kits, which generally mimic the lines of popular rides of the 1920s through the '65–‘70 era, are for hobbyists looking to recreate classic rides with intricate detail. This article focuses on the appeal, features, building techniques, and expert tips for building vintage model cars and is a tribute to the art of the classic car in miniature.
Vintage Model Car Building is Just So Cool
Model car kits recreate the glory days of motoring, back when hot rods roamed the streets and the roar of an engine could take away your breath. Their designs and history appeal to collectors, hobbyists, and those who love cars. Constructing these models serves as a touchstone to automotive history and a way to better understand automobiles and creative expression through the medium of an accurate model.
Nostalgic Appeal
Such kits replicate classic cars such as 1950s convertibles, 1930s coupes, or 1960s muscle cars, taking people on trips down memory lane. Every model has a story, as the designs serve as signifiers of their eras, which is why those who are fascinated with automobiles also love automotive history.
● Historical Fit: It is reminiscent of a past era of cars.
● Emotional Resonance: Reminds you of who you are or where you come from.
● Stylish: Old-school design with a hint of chrome and a lot of class.
Technical and Artistic Difficulty
Making vintage car models is a job of precision, from fitting little engine parts to painting detailed bodywork. Kits are available from entry-level (100 pieces) to advanced (500-plus pieces), so there’s a satisfying challenge that’s just right for any age and ability that plays a part in developing dexterity and problem-solving.
● Skills Developed: Develops fine motor skills and patience.
● Creative Freedom: Can be personalized using paint or decals.
● Gratifying Result: You get a real, working copy.
Collectible Masterpieces
Finished models, which can be anywhere from 15–30 cm in length, make for a striking display for your home, office, or even garage! Their finer details and working doors and chrome quality mean they are worth as a collector’s item, appreciated by owners and collectors alike at model shows and also in the possession of their collections.
● Display Quality: Perfect in a showcase or on a shelf.
● Conversation Pieces: Get a conversation going about car history.
● Endurable Value: Durable materials guarantee serving you for a long duration.
Anatomy of an Antique Model Car Kit
You need to know what the kit contains for a decent build/reset. All components provide their share for an authentic and functional model. Being familiar with what these are results in an easy-to-assemble and fun building experience.
Primary Materials
Kits generally consist of plastic (the most common), metal (a rarer building material), or resin parts. Plastic ones have body panels, interiors, and the like, which are typically injection-molded, while the metal variety features pieces made of laser-cut metal or chrome. High-detail custom parts are made of resin.
● Plastic Pieces: Easy to paint, lightweight, 100–500 pieces.
● Metal Parts: Long-lasting, used for chassis, etc.
● Resin: Intended for interior or kitbashing.
Functional Components
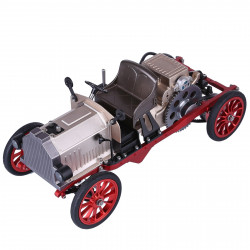
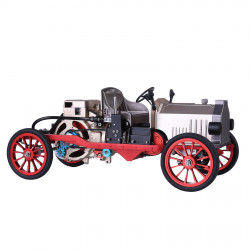
Most of the time, vintage car kits come with working features, such as opening hoods and steerable wheels, and they may even come with detailed working engines. Some metal sets include working suspensions or spinning driveshafts for that added realism and play value.
● Movable Parts: Opening doors, hoods, or trunks.
● Things That Go: Pistons, axles, or steering.
● True-to-Life Detail: Chrome accents, rubber tire treads, or translucent windows.
Adjustment Aids and Options
Kits come with or ship tools: the hobby knife, the tweezers, the screwdriver. Plastic kits require adhesives (plastic cement or super glue) and paints (acrylic or enamel) to complete, and metal kits require screws and/or tabs. (Decals are the logos, stripes, or license plates.)
● Essential Tools: Knives for removing, tweezers for fitting.
● Glue/Paint: For attaching plastic parts and for final painting.
● Decals: Waterslide for realistic marking.
Instruction Manual
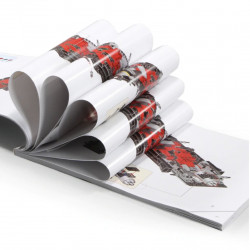
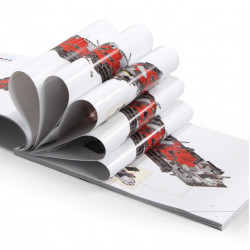
Instructions are laid out in a thorough manual, while painting tips and decal application may both be found in the accompanying magazine. Some have little historical notes about the car’s design or era, which adds to the experience.
● Clean Pictures: Show step-by-step assembly pages.
● Tips and Techniques: Fill painting or weathering guides.
● Flavor: Puts some spice on the build.
How to Select a Vintage Model Car Kit
Picking out a kit that fits your skill level and interest makes for a more enjoyable build. Here are the things to consider when you’re looking for that perfect timeless ride. Careful selection leads to the best-ever experience.
Skill Level
Starter kits (100 to 200 pieces, two to four hours) are designed for beginners and are available in simpler designs, such as 1950s sedans. Intermediate (200 to 350 pieces, 4 to 6 hours) and advanced kits (350 or more pieces, 6 to 10 or more hours), such as elaborate hot rods, also test skilled builders.
● Novice: Some simple coupes or convertibles, fewer parts.
● Intermediate: Muscle cars (detailed engines).
● Master: Own a customized hot rod or an old race car.
Car Era and Style
Kits exist from a wide range of eras, such as the 1920s–30s (early roadsters), 1940s–50s (classic sedans), or 1960s–70s (muscle cars or hot rods). Select based on passion—a history buff may choose a 1930s gangster car, while a speed enthusiast would opt for a 1960s dragster.
● Early Classics: Pre-war models, exposed wheels.
● Post-War Icons: Chrome-laden four-door or convertibles.
● Muscle Era: Big, bold, aggressive, and in your face.
Build Time and Space
Quick kits accommodate overloaded calendars; advanced models need to be revisited multiple times and spread out in a workshop. Have a bright table available (minimum of 50x50 cm) on which to place parts, tools, and the painting. Refer to your kit’s model scale (1:24 or 1:18, for example) when planning its display.
● Quick Builds: 2–4 hours for easier kits.
● Extended Projects: 6–10+ hours for intricate designs.
● What You Need: A place for sorting, gluing, and painting.
Preparing Your Build for Proficiency
A good workspace and tools can make it more accurate and fun! Getting it right helps to avoid mistakes and minimize any hassle. Here are the steps to get off on the right foot.
Workspace Essentials
Select a flat, clean table and a cutting mat to avoid scratches. A puzzle mat or tray can be handy for in-progress storage. Bright, adjustable LED lights ease eyestrain for fine painting or the use of metallic paints.
● Large Work Surface: For holding parts, tools, and the instruction manual.
● Surface Protection: Cutting mat or newsprint when painting.
● Good for the Eyeball: LED bulb for detail clarity.
Tool Checklist
Get kit-supplied tools (some metal kits come with screwdrivers), as well as the basics such as hobby knives, tweezers, and fine sandpaper. For plastic models, such as plastic cement and acrylic paint. A soft cloth ensures parts stay clean, while a magnifying glass helps with precision.
● The Right Tools: Knife for trimming, tweezers for decals.
● Paints Used: Acrylics for the body, enamel for the chrome.
● Cleaning Use: Cloth used for cleaning fingerprint-free parts.
Safety Precautions
Wear protective eyewear when cutting plastic and metal. Use gloves when dealing with adhesives or sharp corners. Work in a well-ventilated space when painting or gluing, and have the first-aid kit handy for those small wounds.
● Eye Protection: Protects eyes from plastic or metal fragments.
● Hand Protection: Gloves for glues and sharp pieces.
● Ventilation: Open your windows or use a spray booth for paints.
Step-by-Step Building Process
A methodical process leads to a clean finish. Just follow the following steps to assemble your vintage model car with amazing precision and style. Every stage is leading to a classic—the kind that transcends any single season.
Step 1: Study the Manual
Carefully study the instruction booklet, write down part numbers, assembly steps, and painting or decal hints. Learn how to use diagrams and historical notes to understand how the car is designed and prevent mistakes.
Step 2: Sort Parts and Check Parts
Dye and log the sprues (either plastic or metal) and separate everything by type into containers marked as such (i.e., body, interior, etc.). Look for missing or defective parts; call the manufacturer if any part is missing. Cut off plastic sprue marks with a hobby knife.
Step 3: Installing the Chassis and Engine
Begin with the frame, attaching suspension and frame components (plastic) or by screwing them in (metal). Construct the engine block and detail it with carburetors, belts, etc. Align axles, steering, etc., for functional components.
Step 4: Assemble the Body and Interior
Glue or screw body panels, hood, and doors together nice and tight. Include interiors with seats, dashboard, and steering wheel. Check for smooth operation of moving parts (doors, etc.) before making final connections.
Step 5: Add Paint and Decals
Prime parts with model spray or brush-on primer and paint thin layers with model acrylic or enamel paint for body and details. Apply water-slide decals for logos or stripes and seal with a clear coat. For metal kits, polish or apply very light paint for chromed surfaces.
Step 6: Final Gluing and Finishing
Connect wheels, windows, and chrome trim (wheels must spin freely if they are supposed to). Check all moving parts for condition and secure connections. Rub with a soft cloth for plastic or metal shine, then store safely or display.
Overcoming Common Challenges
Hurdles with classic car kits range from botched paint to part alignments. Take control using proactive fixes to keep your build on the rails. This advice hits easily on common problems.
Paint Imperfections
Such plastic parts may develop uneven paint or drips. Burnish lightly after several coats with 600-grit sandpaper to achieve a thin (2–3 coats) finish. Use masking tape to mask off such things as windows or chrome trim.
● Thin Coats: No runs and no loss of texture.
● Sanding: Even surfaces so acrylic paint will adhere better.
● Mask: To ensure clean lines with multicolor designs.
Part Misalignment
Plastic pieces might warp, and metal tabs might not slot in. For plastic, soak the warped parts in warm water and reshape. For metal, use pliers to adjust tabs. Fit-check components before gluing or applying anything to ensure proper positioning.
● Reshaping Plastic: Hot water for a little warping.
● Tab Alteration: Pliers to accurately fit metal tabs.
● Dry-Fit Checks: Confirm the alignment before you assemble.
