Review Build: Steampunk Mechanical Octopus

Review Build: Steampunk Mechanical Octopus
As you may have observed, this model differs from the others I have created on this site. However, it's closely related. Additionally, it's more of a do-it-yourself piece of art than I should even call a model. It's an artwork constructed with metal gear that resembles a model in certain aspects but differs from it. But it's gorgeous whether it's a model or a one-of-a-kind do-it-yourself creation.
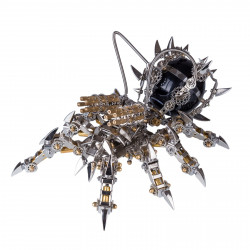
In addition to being large, it is composed of an enormous number of parts. What's remarkable is that those screws are little despite their size. Incredibly, incredibly small. The segmented tentacles and brass gears on this sculpture really catch your eye, and I adore the steampunk aesthetic they have. Additionally, while being constructed from relatively small components, it is surprisingly large. The outcome is intricate and intimidating.
Why, then, am I creating something so unique? As it happens, I was contacted by MoyuStore, the company that produces them, asking whether I would be interested in making one if they sent it to me. And the ideas and designs captivated me. Naturally, I started by letting them know that I always give honest and straightforward assessments, posting both the positive and negative aspects of any construct, whether I purchased it myself or had it sent to me for evaluation. They expected no less and were entirely content with this. I, therefore, concurred.
Naturally, the small surprise item that came with the model caught me off guard. As you can see, this model is made to allow you to place a small Bluetooth speaker or light within the "bulbous" part, which is really cool (they are available on the internet as accessories or in a bundle). However, they also sell light-up planetoids that are 3D printed and can be personalized with images—or, in this example, a brand! Naturally, I won't let that affect my review, and since it's a product they sell, I won't perceive it as a bribe.
Upon viewing these models, you may notice that they are more expensive than my typical laser-cut metal sheet models, which now range from USD 65 to USD 90. They're beyond my typical spending limit, but I stick to a stricter spending plan than many other builders. However, I can appreciate the higher price tag given the materials used to manufacture these, not only for the content itself but also for the other goodies in the box (more on that later) and the effort required to bundle everything together. You may check out their web store here (which features a Jupiter light) if this kind of model appeals to you: https://bit.ly/3vzWO3P (This isn't an affiliate link; I don't get paid for it). My son has just developed an obsession with solving Rubik's cubes, so I purchased a speed cube for him from them, and he adores it.
I breezed through three builds in a row in my most recent attempt to "get back in the swing of things," intending to write all three pieces soon after. That obviously didn't happen, and I apologize for the delay in providing this review. I hope they realize that I wasn't merely attempting to obtain a free model without fulfilling my end of the bargain. But now that we're here, I'll share my honest thoughts and experiences with the construction with you, the readers. It looks fantastic, as I've already stated.
The build was fun and rewarding for the most part. It didn't, however, go off without any problems. Though, that is more a result of my lack of expertise with this kind of model than anything else. Or the fact that my fingers are large and chunky. In my mushy pinchers, some of those nuts, washers, and screws felt like tiny particles. It was difficult to line the nuts and screw them onto the small screws without cross-threading. Before I figured it out, I cross-threaded a few nuts (fortunately, the model comes with a few extras).
Importantly, I was always able to switch to a new nut, even when I had nuts that became cross-threaded and unusable. There was never any damage to the screws. Naturally, I checked and double-checked because I was suspicious, but I believe I've concluded that the machine screws are much more hardened than the nuts, so if you have binding when making one of these models, don't bother changing the screw; it's probably fine.
In case it wasn't apparent from looking at the model, there is a lot of lather-rinse-repeat in this model, especially regarding the tentacles. But you have to realize that without those incredible tentacles, it wouldn't be quite as spectacular. I discovered that figuring out the components in advance required some time and consideration in order to solve this puzzle.
After calculating how much of each piece was needed to finish the first tentacle, I just made them accessible in stacks. I grabbed each component as required, and this felt a little slow. However, it also benefited me because I was able to figure out a "process" for adding each part that I found to be effective.
I arranged the components for the next tentacles in segment groups so that I could work my way down them. By only knocking out some pre-assembled parts, I was able to perfect this further as I went along. In particular, the machine screw went through the two sections that were added before the screw was threaded through the holes in the tentacle's prior segment. At this time, things truly began to feel like they were moving quickly.
Naturally, given all of this discussion on knolling, I had to point out a few significant differences between these models (based on my experience). Those would have been obvious if I had given it any thought, but I obviously didn't. In any case, the parts for this kind of model are not delivered on a big sheet that you cut out. No, they are packaged in tiny plastic baggies that can be sealed. Furthermore, a lot of the components are not magnet-sticky. Thus, this posed a few difficulties for knolling.
I bought these inexpensive little "snack containers" in a box of ten from my neighborhood dollar store as a solution to both problems. I purchased enough packets so that any part that has multiple parts could have its container. I was able to avoid opening and closing little ziploc baggies several times. Regarding the fact that many parts are non-magnetic, I identified (from those containers) the pieces that I intended to assemble in one sitting. A little more preparation was needed for this, but having three cats makes it worthwhile. This procedure was less annoying, thanks to the snack packets. In order to write the part numbers on the containers, I also applied masking tape to their sides. I don't want to confuse that!
Going back to the model-building process, it actually begins with the tentacles' lather-rinse-repeat cycle, perhaps to get that out of the way. And I cranked through them. However, I made a significant error here: I did not tighten the joints sufficiently. You should tighten these down more than you think. I didn't leave them loose or anything. Like, much more. Since I still wanted to be able to pose the tentacles, I reasoned that I shouldn't make it too tight. Posable is relative. In other words, if you want it to be able to stand on those tentacles, you want the joints to be pretty damned stiff. Posing with a stiff joint is still possible; it just requires more work. And compared to an octopus that collapses when you attempt to stand it up, it is far less annoying.
However, there's another incentive to go really tight. The model's included nuts aren't locknuts. Additionally, because you will be moving and adjusting the model a lot throughout the assembly, I experienced several instances where the nuts came loose and a couple of cases in which they fell off entirely. Particularly when I was attempting to connect the tentacles to the octopus's core. I had to turn the tentacles a little, then secure one, and so on, since it got a little crowded. I'm getting ahead of myself, though; I'll talk more about that later. To ensure that the nuts stay in place, I would really prefer a transparent thread lock, but I was unable to locate one.
As you may have seen, my model's tentacles have a slight twist all the way along. As I was building them, I was attempting to straighten them up, so I don't know what I did that created this. However, I am aware of what makes it possible. There is a significant amount of flex in the screws' fit with the holes in the brass segments. That is advantageous for assembly, though, because it would be tough to get the machine screws through holes that are precisely the right size, especially when the screw ends up going through them at an angle. Therefore, this is not a design problem. I wish I knew how to avoid getting caught in a knot.
When it came to the tentacles' end, I became perplexed by the procedure. One of the segments that deviates from the "standard" pattern employed in the other parts was successfully omitted by me. Totally. Furthermore, I didn't realize until I was putting together the second or third tentacle—I can't recall which at this time. I, therefore, had to redo the end or ends I had completed. There are three distinct segments near the end of the tentacles, so listen carefully. The first involves no plastic washers, and two of the brass pieces are positioned in between the brass pieces of the preceding segment (steps 7 & 8). Steps 9 and 10 of the second segment, which again does not use plastic washers, sandwich those two brass pieces between two more. Finally, a single brass piece—without washers—is positioned between the two brass pieces from the prior segment (steps 11 & 12).
Now for the awkward part: it looks like I only used one of the tentacles correctly for the final three segments (shown above). Considering that I went back to fix the first one after realizing I had done it incorrectly... How I ended up with seven of them done incorrectly is beyond me. So, yes, I was utterly perplexed twice. But to be honest, I blame myself. I made a mistake in stages 7 and 8, putting the extra brass pieces on the outside instead of sandwiched in the center.
Let's return to the octopus's core. I made a huge mistake here, but it was entirely my fault. I made the wise decision to have the attachment points symmetrical throughout the model because the tentacles in this part are attached to a double set of gears (and also hold those together). In order for the tentacles to face the same direction (in relation to the entire model) when built, I flipped the L-shaped component (#27) on half of them. The L-shaped portion of one side faces clockwise, while the other side faces counterclockwise.
The notion was a bad one. To "style" your build, you don't want to tamper with the assembly instructions. For this and other reasons, I call this product an art replica instead of a model. If you don't follow the instructions precisely, you could make the same mistakes I did. and completely overlook the fact that there are three tentacles on each side, one in the front, and one in the back. Additionally, the L-shaped pieces must all be facing the same rotational direction in order to avoid colliding and making it impossible to attach them correctly. Don't be like me, then.
Returning to how tiny the space was for attaching the tentacles, it isn't enjoyable to have to do it twice. And I'm going to take a brief digression, just like I do with most of the rest of this review. Because all the tools you need to build it are included in this model. I found myself switching between the many sizes of screwdrivers that were included to suit the specific task, although I mostly used the 4-sided mini-socket wrench for the nuts. However, the tentacles themselves partially obstruct the screw head used to secure the tentacles to the base. It makes it a little tricky to tighten these nuts and screws, and it's crucial to do so firmly. The most "self-loosening" issues were with these connecting locations.
Then, based on my own experience, you reach the most thrilling portion of the build. You get to attach the red-light eye, start assembling the bulbous portion of the body, and begin making the steampunk decoration of the octopus' core. However, I encountered a minor obstacle as I was approaching this stage. Step 29 stated that part 10 was required and that a screw was required. But since I had been using part 10 a lot, and it was significantly shorter than the screw in the photo, I knew it was incorrect. Part 11 or Part 16 must be it, I reasoned. I choose to utilize section 11. MoyuStore has since informed me that part 11 is the right one to use and that the instructions have already been updated. In any case, be cautious if you manage to obtain one of these with outdated instructions.
I then proceeded to the bulbous portion of the body, where I ultimately found myself departing from the guidelines once more. Yes, I did warn you about doing that. However, this time, I put everything together in a slightly different order, but the final shape was still the same. In steps 36–38, you are instructed to first join the long flat sides (parts 50) to the center assembly (from stages 33–35). After that, you are to build and add the pre-assembled sharp tip sections (steps 39–44). Due to the limited area, I found it difficult to hold the long flat pieces (part 50) in place on the center assembly. In order to have some "assistance" in keeping everything together when I attached it to the center assembly, I decided to construct the pointy tips first and then attach them to the long, flat pieces. I would suggest it and believe it worked pretty effectively. 34–35 is the practical order, followed by 39–43 and 36–38. Below is a very rough mockup of what that would look like.
I've already highlighted a few times how challenging this project was due to the small space. However, I've also said that I have pretty big fingers, therefore I have trouble in tight places. Therefore, those things may not have a significant impact on you. Phase 50, the build's final phase, is different. You will feel constrained by the small confines, regardless of who you are. How I accomplished this stage is still a mystery to me. It's challenging to figure out how to keep the components in place while driving the screw through them because of all the decoration at the center and then screwing it together after somehow getting that little nut on the threads? That was quite a problem. However, it is obviously feasible. That should be encouraging.
I'm sure you're curious about how long this project took me. I'm shocked to say that I built this in under seven hours. Naturally, I spent a few hours figuring out every element, but I don't keep track of that, so I can't give you a precise time. Interestingly, I took about 53 minutes to complete the first tentacle, 36 minutes to complete the second, 46 minutes to complete the next two, and an additional 81 minutes to complete the final four. As I went through it, there was undoubtedly improvement.
