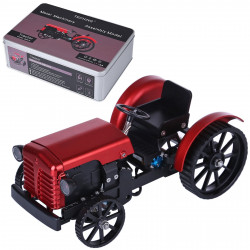
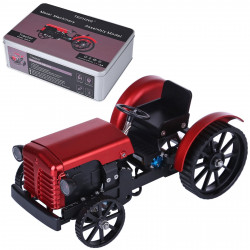
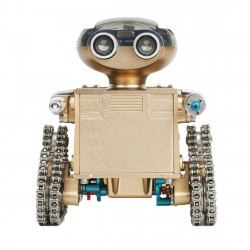
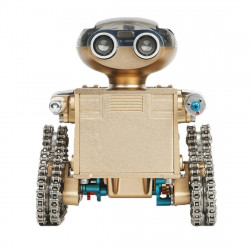
Teching Assembly Model
Learn by Building: The Power of Teaching Assembly Models
Using complex assembly models of engines, vehicles, or buildings, firmly sealed and illuminated, young and old alike gain an early understanding of engineering, physics, and design principles. This guide examines the instructional value of assembling models, the advantages and types, as well as practical ways for teachers, parents, and hobbyists to help learners get the most from the construction experience.
The Educational Potential of Assembly Models
Constructing models turns concepts into life-like creations and is a perfect tool for education. Whether at school, at home, or anywhere, these kits are the links between theory and practice as they arouse curiosity and as the students hone their skills. Their popularity surge, evident in the rise of STEM programs and maker spaces, is a testament to their way of teaching through doing.
Hands-On Learning
Creating models involves different senses, which enables tactile reinforcement of concepts such as mechanics, geometry, and aerodynamics. Building a turbine engine or a model of a bridge gives learners the ability to see how parts work together or how theoretical knowledge can become practical understanding.
- Tactile Involvement: Reinforces retention through physical interaction.
- Concept Visualization: Transforms abstract thoughts into something that can be seen.
- Active Participation: Promotes active problem-solving rather than passively studying.
Skill Development
Model assemblies promote a variety of skills, from fine motor skills to a basic understanding of how things work. Students develop precision, patience, and hand-eye coordination as they follow instructions, are creative in building from their imagination, and pose problems that learners can solve as part of real-world practice.
- Motor Skills: Strengthens small hands and fingers through small-part assembly.
- Brain Buy: Exercises the brain with pure skills like logic, ordering, and analysis.
- Resilience: Encourages keeping trying through trial and error.
Motivational and Fun
The act of fooling around to construct a model that actually works or looks good is intrinsically rewarding in and of itself and keeps motivation running high. Finishing a model, such as a working gearbox or a detailed car, gives a sense of pride and indebtedness to and interest in further unlocking the secrets of STEM fields.
- The Reward Itself: People in general love results they can see, and results produce great excitement.
- Engagement: Entertaining, creative process holds attention.
- Confidence Powering Inspiration: Achievement leads to a desire for more knowledge.
Advantages of Instruction with Assembly Models
Assembly models in education provide several inherent advantages over traditional procedures. It’s this flexibility that makes them so good for teaching complex concepts in a fun, approachable manner.
Conceptual Understanding is Lengthened
In assembling models, students learn how elements like gears, pistons, or trusses work together. For instance, a four-stroke engine model represents the combustion cycle and vividly interprets the physics or engineering that is not simply learned from books.
- Context: Relates theory to the real world.
- Thinking Systemically: Demonstrates how parts come together to form a whole.
- Retention: Knowledge is retained when learned via hands-on training.
Enhances Group Work
By taking part in group work, assembly models encourage collaboration in learning. Being a member of a team, communication and role-play are encouraged. Tasks can be divided between students or family members, with one person sorting parts and the other reading instructions, an echo of collaborative engineering projects in professional environments.
- Teamwork: Encourages teamwork and team play.
- Communication: Instruction and feedback must be clear.
- Success Shared: Fosters friendship through shared success.
Flexible for Grades and Subjects
Assembly models are accessible to different types of learners, from aspiring young engineers who want to build a simple vehicle when they’re 5 years old to older engineers who are ready to build a more complicated turbine. They are used to teach courses in subjects like physics, history, or design, rendering them versatile for schools, homeschooling, and hobbyist workshops.
- Age Versatility: From kid-friendly to adult-perplexing.
- Cross-Curricular: Works with STEM, history, or arts.
- For All Learning: For visual, tactile, and auditory learners.
Assembly Models Description for Instruction
There are different assembly models to meet individual teaching needs and skill levels. These classifications, illustrated with popular choices and their uses for learning, make perfect sense for all your lessons.
Mechanical Models
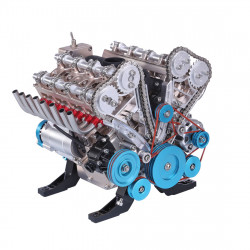
Mechanics and physics are taught by kits such as engines, gearboxes, and clocks. Metal or plastic models that have moving parts (like a V8 engine or hand-cranked motor) help to illustrate concepts such as torque, force, energy transfer, and gear ratios.
- Examples: Four-stroke engines, planetary gear systems.
- Subject Focus: Mechanics, physics, engineering.
- Construction Time: 2 to 10 hours, beginner to expert.
Vehicle Models
Kits for cars, airplanes, or ships teach about aerodynamics, automotive design, or naval engineering. Plastic or metal copycat models—vintage cars or a jet turbine, for example—offer lessons in structural design and historical background and may be right for transportation buffs.
- Examples: Muscle cars of the 1960s, turbofan engines.
- Learning Focus: Design, history, aerodynamics.
- Construction Time: 2–8 hours, beginner to intermediate.
Architectural Models
Miniature bridges, buildings, or landmarks can be used to illustrate architectural designs, while toy bridges and domes offer lessons in geometry and structural engineering. Kits like truss bridges or historical towers teach load distribution and architectural history and are perfect for design or math lessons.
- Examples: Suspension bridges, Gothic cathedrals.
- Learning Focus: Geometry, engineering, history.
- Construction Time: 1 to 6 hours, beginner to intermediate.
3D Puzzles and Modular Kits
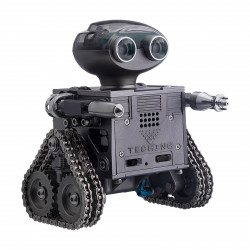
3D puzzles, such as animal shapes or modular robots, help to develop spatial reasoning and creative thinking. These, many of which are made of wood, metal, or plastic, are wonderful for young learners or interdisciplinary art and science lessons.
- Examples: Articulated dragons, robotic arms.
- Skills Developed: Spatial analysis, creativity, mechanics (cogs, gears).
- Build Time: 1 to 4 hours, beginner to intermediate.
Best Assembly Kit Models to Teach With
The following is a list of five ideal models appropriate for educational use for their learning potential, accessibility, and engagement. These descriptions are general and include school uses and specific ideas, including approximate cost based on the average market price.
Four-Stroke Engine Model
This 200-piece plastic or metal kit creates a fully functioning four-stroke engine complete with moving pistons and a see-through design to give a mechanic’s-eye view of internals. It provides an explanation of the combustion cycle and energy conversion and is perfect for physics or auto classes.
- Build Time: 3–5 hours, beginner to intermediate.
- Number of Pieces: About 200.
- Price Range: $30–$50..
- Educational Value: Provides insight into the mechanics and thermodynamics of engines.
- Tip: Pair with a diagram explaining each stroke (intake, compression, power, exhaust).
Vintage Car Replica
A 250-piece plastic kit of a 1950s sedan with an opening hood and detailed engine introduces automotive design and history. Its medium complexity supports middle-school or lay groups interested in engineering or cultural studies.
- Build Time: 4–6 hours, intermediate.
- Number of Pieces: About 250.
- Price Range: $25–$40.
- Educational Value: Looks at how cars have evolved in design and historical periods.
- Tip: Pair with a lesson on post-war auto trends for added context.
Truss Bridge Model
This plastic or metal 150-piece kit builds a model truss bridge that shows how tension and compression work in structures. It is great for math or physics classrooms that are studying geometry or force distribution.
- Build Time: 2–4 hours, beginner to intermediate.
- Number of Pieces: Around 150.
- Price Range: $20–$35.
- Educational Value: Teaches structural integrity and how to work with geometry.
- Tip: Test with small weights to demonstrate load capacity, which strengthens physics concepts.
Articulated Robot Arm
A 200-piece metal or plastic kit forms a posable robot arm with simple joints, teaching mechanics and robotics. It’s great for STEM programs or students interested in automation and kinematics.
- Build Time: 3–5 hours, intermediate.
- Number of Pieces: 200.
- Price Range: $30–$45 USD.
- Educational Value: Investigates the mechanics of joints and robotic theory.
- Tip: Combine with a coding project to replicate what it’s like to operate a real robot.
Historical Tower Replica
This 180-piece plastic set constructs a well-known tower, such as a clock or observation tower, providing a lesson in architectural history and engineering design. Great for culture-centric lessons in art, history, or engineering.
- Build Time: 2–4 hours, beginner to intermediate.
- Number of Pieces: About 180.
- Price Range: $20–$35.
- Educational Value: Teaches architectural and structural concepts.
- Tip: Use along with a history lesson about the tower’s period for interdisciplinary learning.
